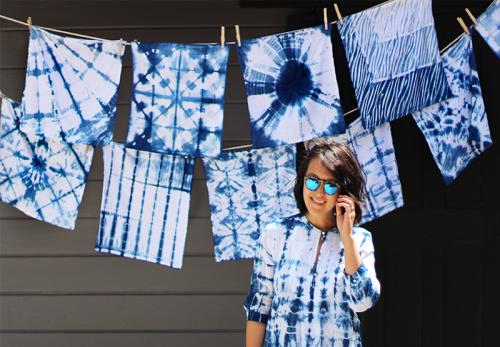
DIY Shibori
Today marks HonestlyWTF’s four year anniversary. Four years! To celebrate, we’re revisiting the very first tutorial we ever featured on the site: shibori tie dye. Lauren and I first discovered shibori after discovering an old photo on the web. The idea of recreating an ancient Japanese dyeing technique inspired us to spend an entire weekend experimenting with our favorite deep blue, indigo. After dyeing just about every white article of clothing in sight, our blue stained fingers excitedly uploaded the tutorial – we couldn’t wait to share it with our 30 readers. And so began the ongoing series of tutorials and DIYs. We hope you enjoy the throwback, one of our favorites to date!
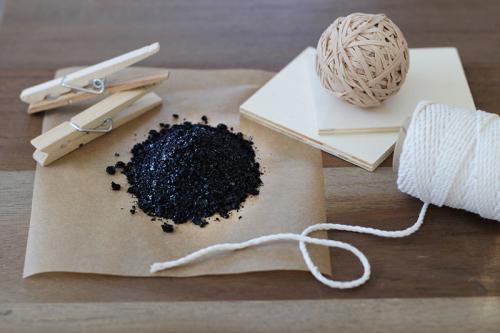
You’ll need:
- an indigo dye kit
- natural fiber clothing or fabric
- 2 5 gallon buckets
- rubber gloves
- small wood squares
- rubber bands
- twine
- a PVC pipe
- a long wooden stick
- a drop cloth
- rubber gloves
- scissors
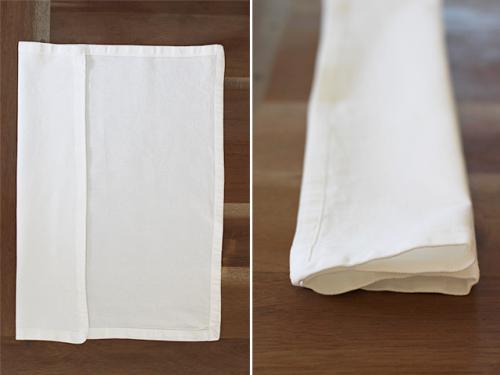
When choosing fabric or clothing, it’s important that made of natural fibers. Cotton, wool, silk or linen work best. I also like to pre-wash my fabric before dyeing. Here I’m using rectangular dinner napkins but obviously, any shape or article of clothing will do! Here are just a few basic binding techniques to try:
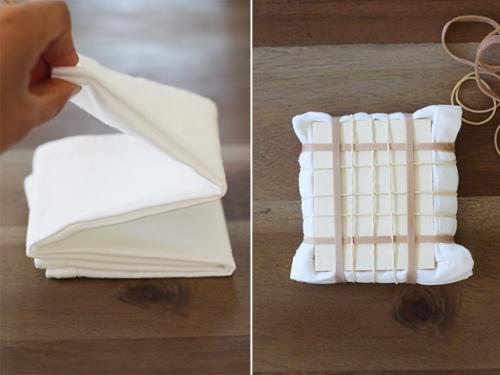
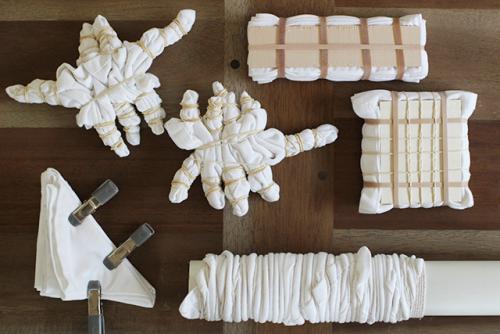
Itajime shibori is known as the shape-resist technique. To start, fold the fabric like an accordion.
Fold it again in the other direction – again, like an accordion. Place it between two pieces of wood, or any flat shaped object, and bind it together with string or rubber bands. The shapes and rubber bands will prevent the dye from penetrating the fabric they cover. The larger the shape and the more rubber bands you use, the more white you will see. The smaller the shape and fewer rubber bands you use, the more indigo you will see.
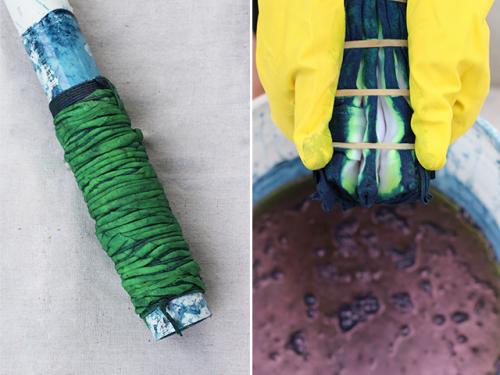
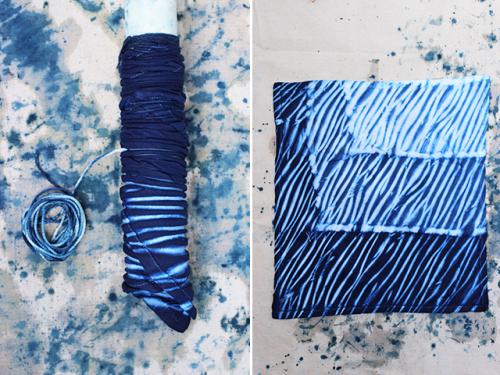
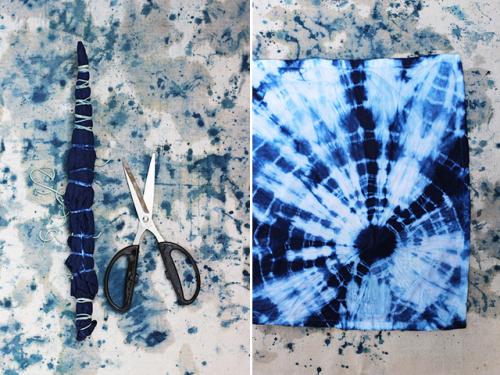
Arashi is the Japanese term for “storm” and it’s also known as the pole-wrapping technique. It starts by wrapping fabric around a plastic PVC pipe at a diagonal. Once the fabric is wrapped, tie a piece of twine into a double knot at the base of the pipe.
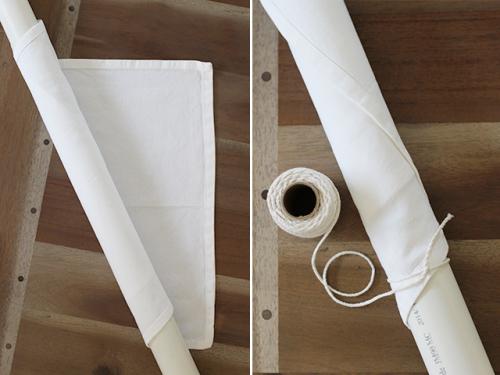
Wrap the twine around the fabric. After 6-7 wraps around the pipe, scrunch the fabric down. Give the twine a strong tug to tighten. Tightening before scrunching will make it more difficult to control and move the fabric.
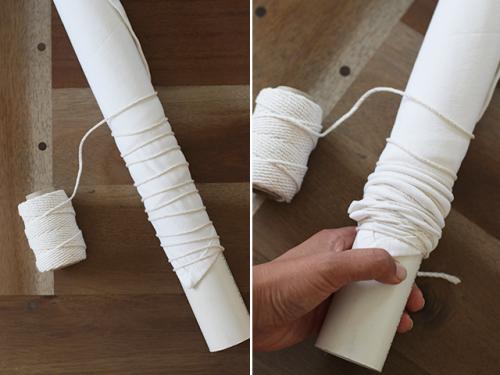
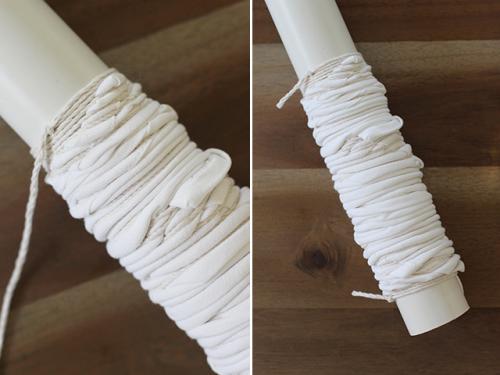
Continue wrapping, scrunching and tightening until all the fabric is compacted. Tie a knot above the fabric. The pattern will be on a diagonal with thin lines of white, where the twine is binding the fabric.
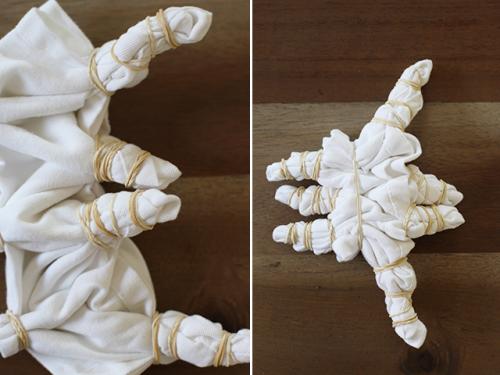
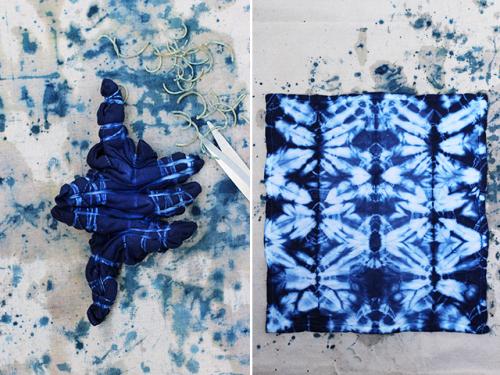
Kumo shibori is known as the pleat and bind technique. It involves binding the fabric in very close sections, which results in several spider like designs. This is just one of many ways to experiment with this technique. Start by folding the fabric into an accordion. Pinch and bind into equal sections.
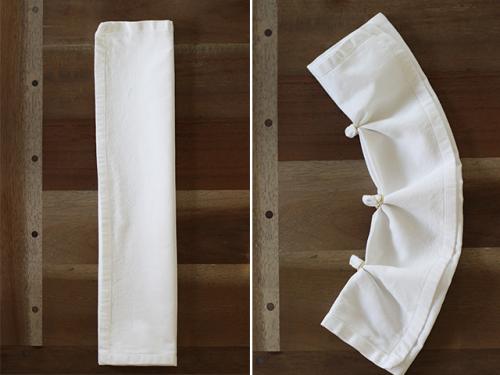
Do the same with the opposite side, in staggered sections. Continue binding with rubber bands, working your way towards the center.

Keep binding until you can’t go any further. Add additional rubber bands to make the fabric into a tight bundle.
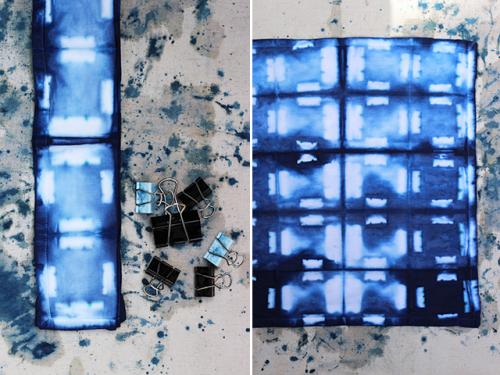
Be resourceful when binding – use clamps, paper clips, binder clips, odd shaped wooden pieces, canning jar lids, etc. There is no right or wrong way to shibori!
To set up the indigo dye vat, follow the accompanying dye kit instructions. For this particular kit, start by filling a 5 gallon bucket with 4 gallons of warm water. Pour the indigo dye powder into the bucket and stir in a circular motion.
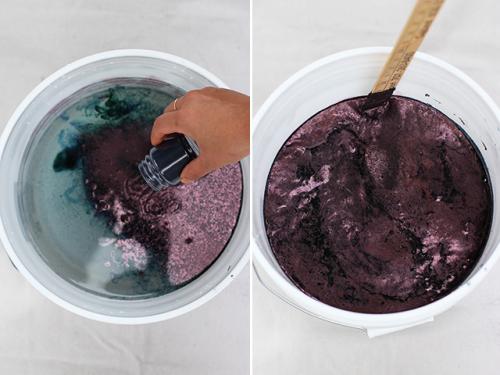
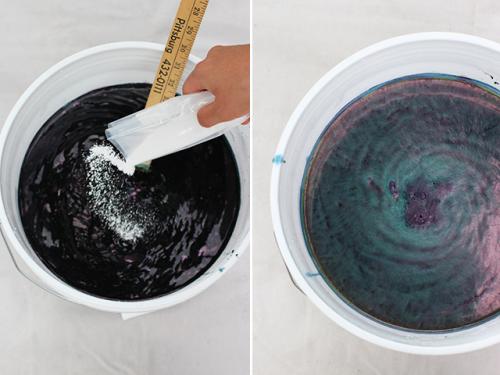
Then pour in the soda ash and reduction agent. Stir again in a circular motion and then in reverse. It is important not to oxidize the dye bath so keeping it covered and stirring it gently is recommended. Once the dyed is well mixed, cover for at least an hour. When you check on the dye, you’ll notice a foamy oil-slick looking top layer and a neon yellow-greenish colored liquid below. This is when you know the dye is ready.
Rinse the fabric in another bucket of clean water. Squeeze out all the water before submerging it into the indigo dye bath. Gently manipulate and massage the dye into the fabric. Again, try not to agitate the dye by working gently under the surface of the dye.
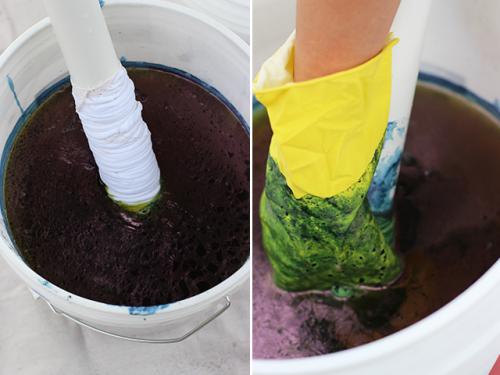
After about 5 minutes, take the fabric out of the dye. It will have a green hue but after several minutes, as it is exposed to oxygen, it will turn dark blue. Carefully peek inside one of your pieces and you’ll see the areas in which the dye wasn’t able to penetrate. Lookin’ good!
After all the pieces have been dyed and allowed to oxidize, go ahead and repeat the dying process. The more it goes into the dye bath, the darker the indigo hue the fabric will be. And remember, the fabric will always look darker when wet and will fade a bit when washed for the first time.
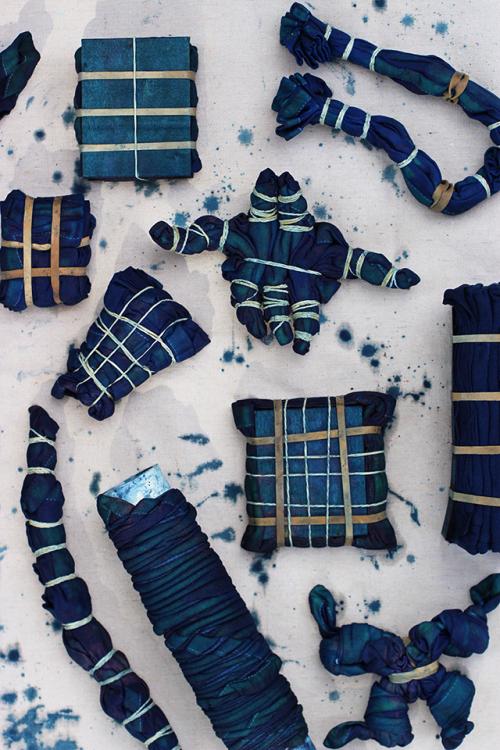
After dyeing, allow the pieces to dry and set. I like to leave them overnight before unwrapping the pieces. Put on a fresh pair of gloves, grab a pair of scissors and keep that bucket of clean water nearby. Give the bound pieces a good rinse in water and then carefully snip away the rubber bands and twine. First up is the shape resist technique. See how the fabric is gridded with striped lines from the rubber bands? My wooden squares weren’t able to exclude the dye completely and I love it! That is the beauty of shibori – there are no mistakes.
Now for the pole tying technique . . .
And the pleated and bound resist technique . . .
I used binder clips here to bind a square accordion fold.
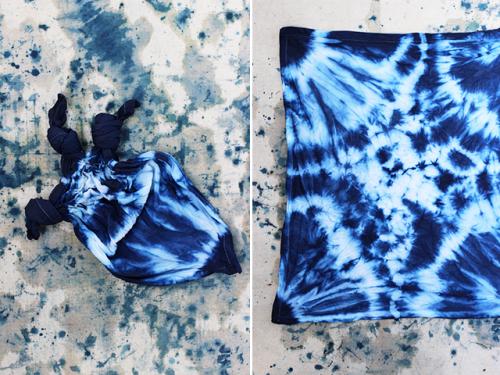
Here, I simply knotted all four corners of the fabric individually.
And then there is the good ol’ binding method we all did in grade school.
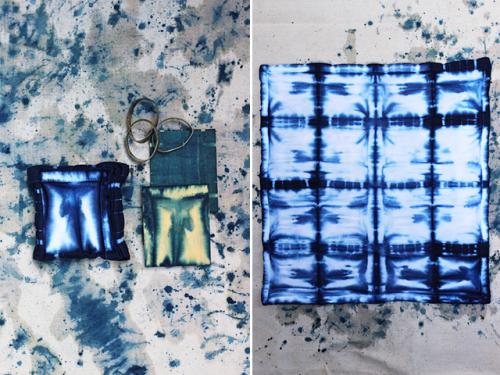
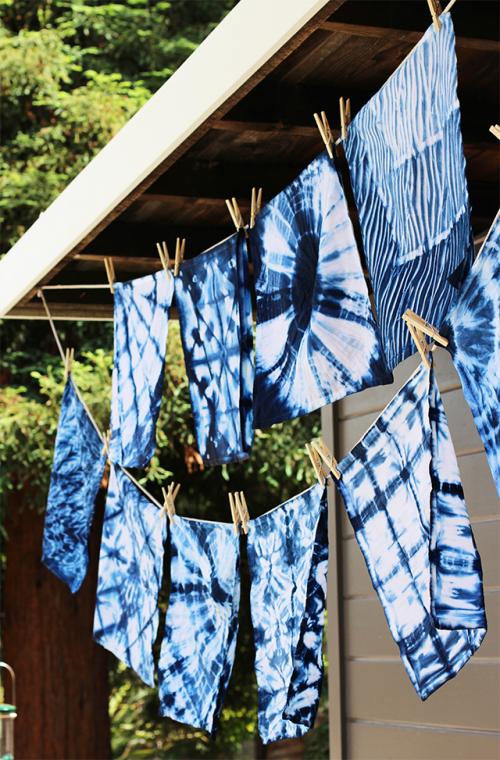
Once all the pieces have been unwrapped, wash them in the washing machine with cold water without detergent. Line dry, or dry on the lowest heat setting in a dryer, and iron to set the color.
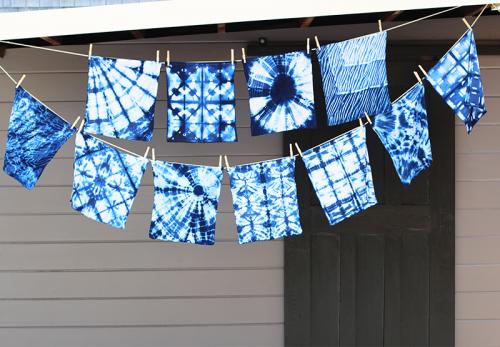
The dye vat should allow you to dye at least 5 pounds of fabric. If you keep it covered after each use, it should last up to 5 days. Have fun!
(images by HonestlyWTF)